This guide makes it easy to install Ninja Form and the Ninja Forms Google Sheet Connector Plugin.
Integration of Ninja Form with Google Sheet : #
- Ensure that you have successfully integrated (Automatic Integration or Manual Integration) Ninja Form with Google Sheet Connector.
Edit Contact Form : #
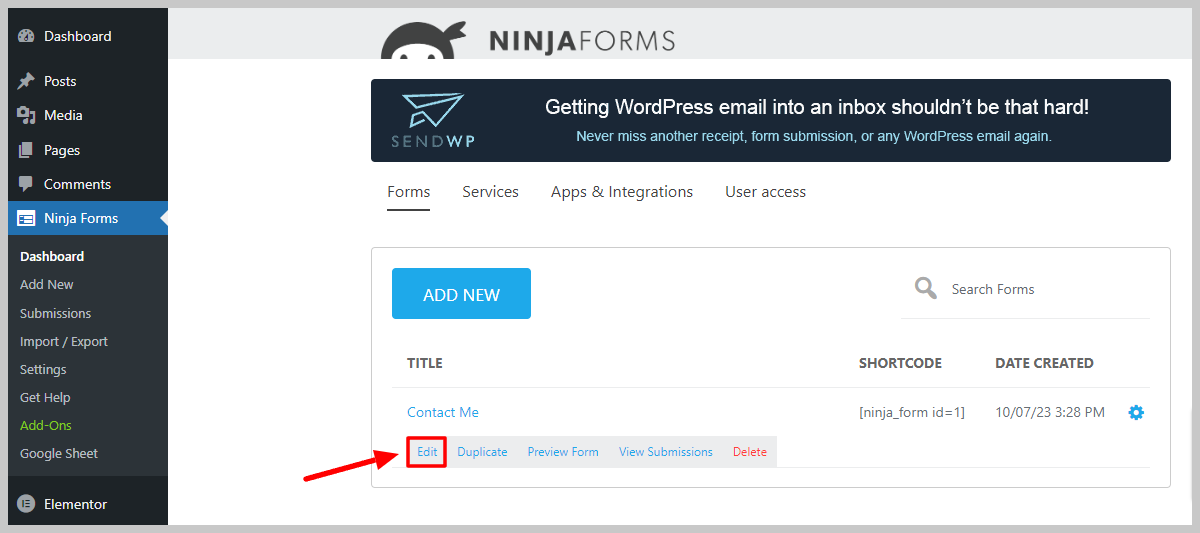
- Go to the Ninja Forms section in your WordPress dashboard.
- Locate and edit the specific Contact Form that you want to integrate with Google Sheets.
Google Sheet Connector : #
Open the Setting : #
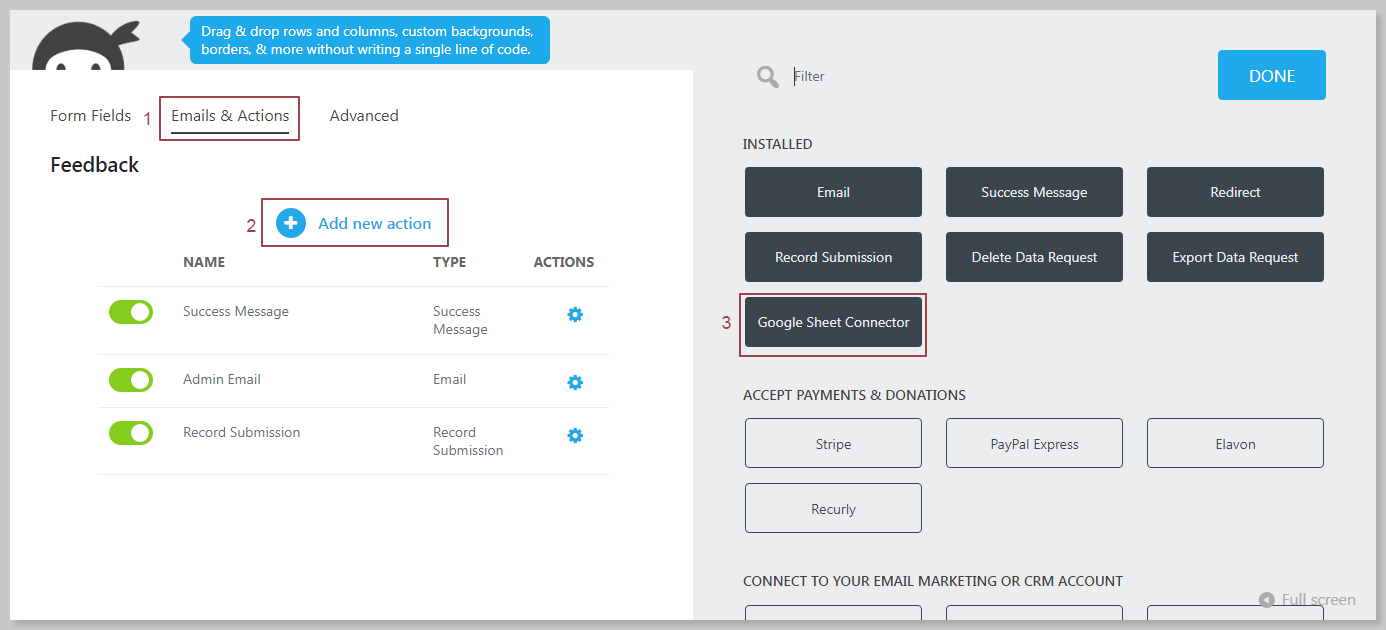
- Within the Contact Form, go to Email & Actions .
- Add New Action – Google Sheet Connector.
Name the Feed & Insert Google Sheet Details : #
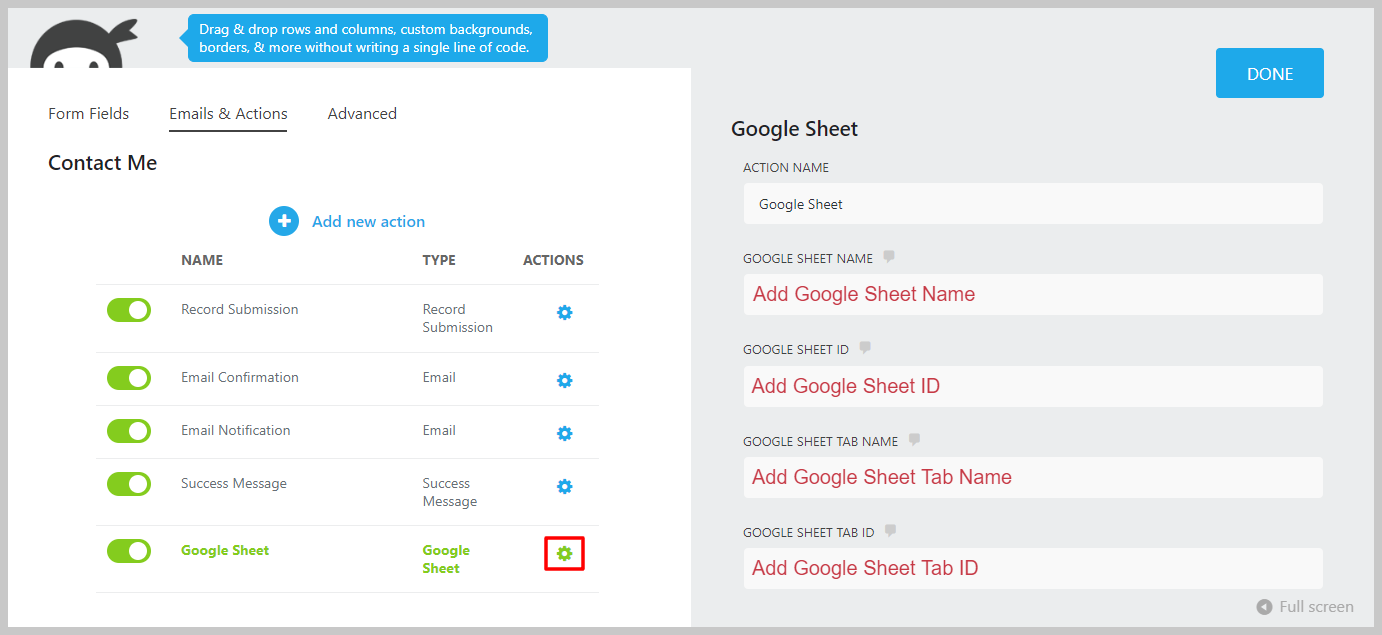
- Give a name to the Action.
- Insert the necessary details for your Google Sheet in the relevant fields:
- Google Sheet Name
- Google Sheet ID
- Google Sheet Tab Name
- Google Sheet Tab Value
Google Sheet Info : #
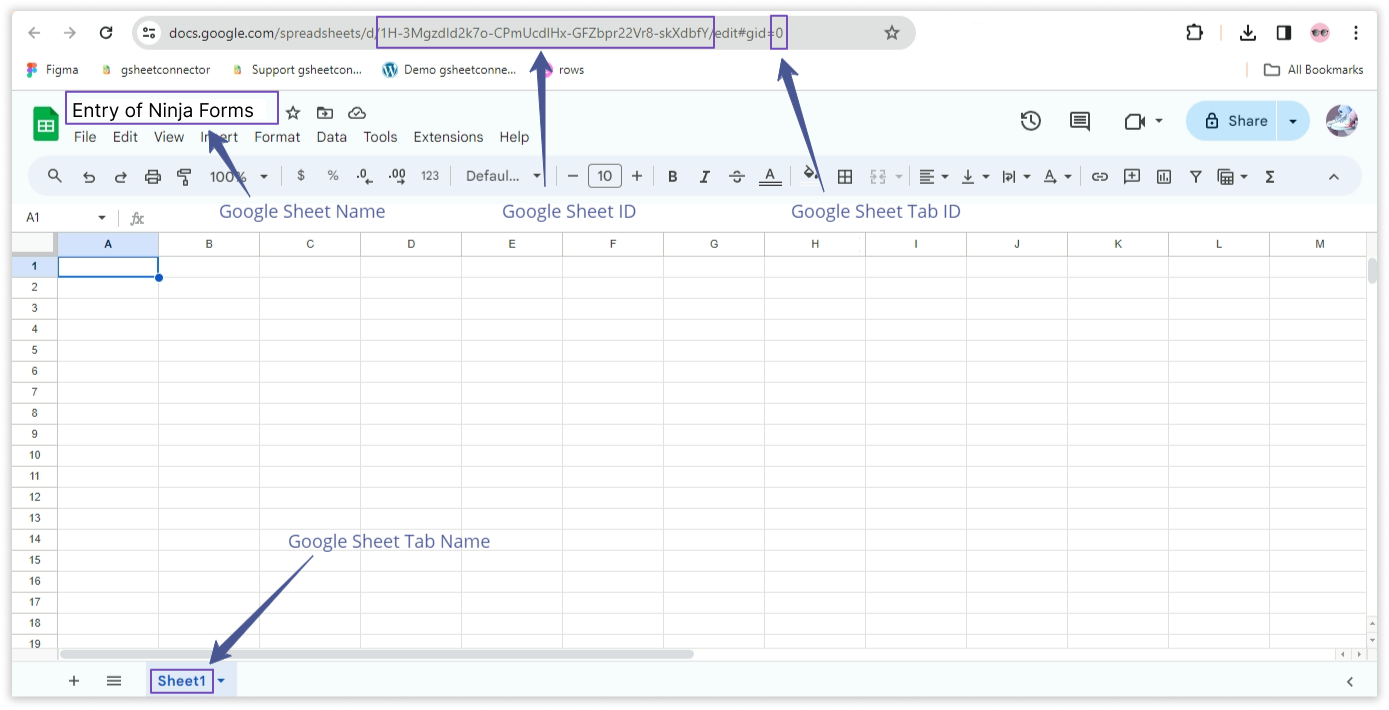
Copy Google Sheet Info like below image.
Copy Label Names : #
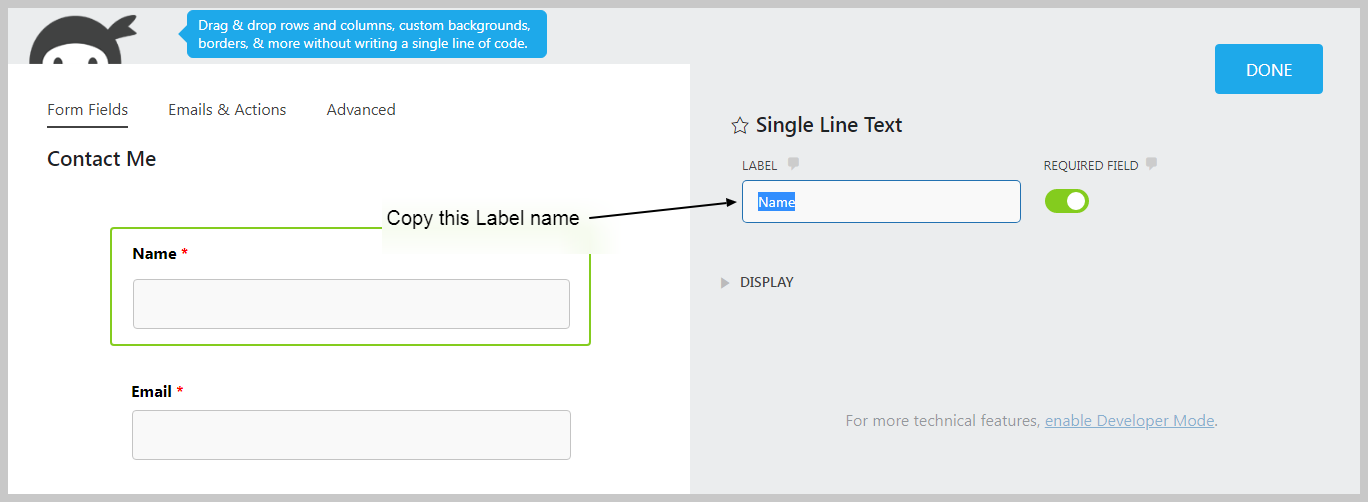
- Navigate to the “Form Fields” tab in your Contact Form editor.
- Copy the Label Names associated with each form field. These label names will serve as identifiers for your form data.
Paste Label Names in Google Spreadsheet : #
- Open your Google Spreadsheet linked to the Contact Form.
- In the corresponding columns, paste the Label Names from the Contact Form.
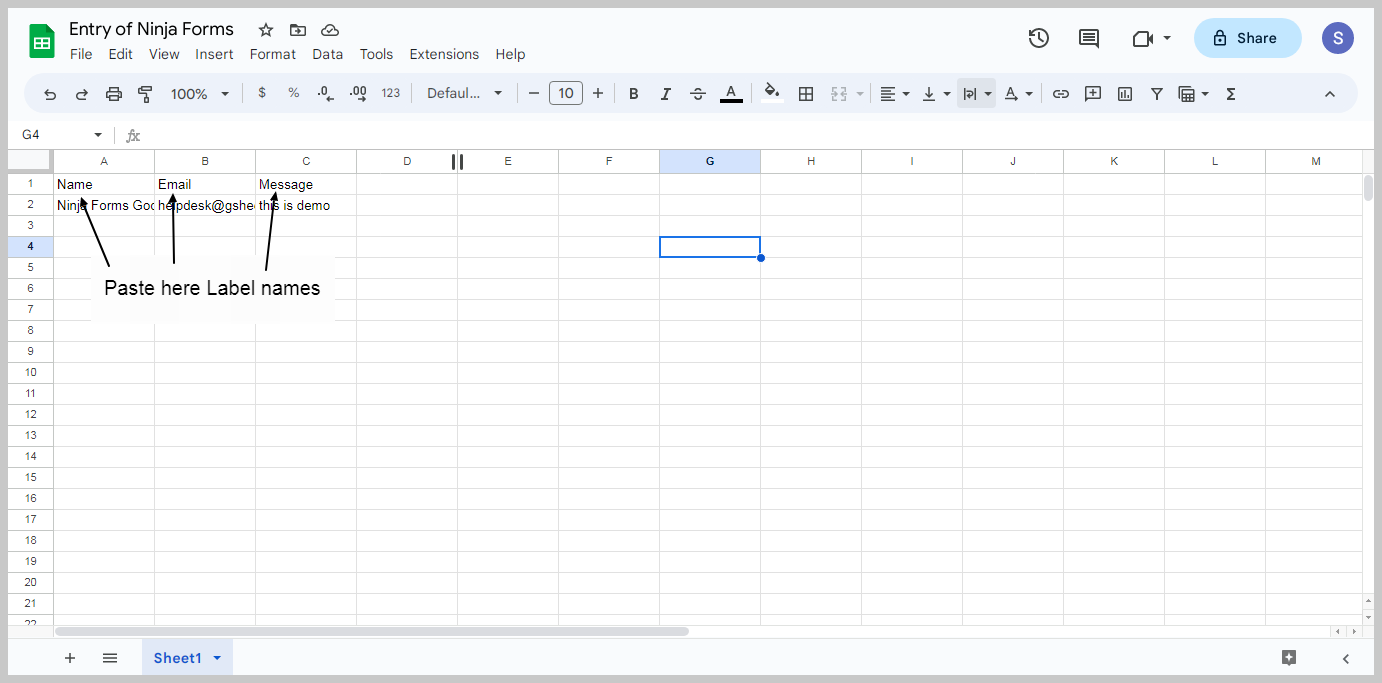
Additionally if you want to see the submission date of the form in google sheet then simply add one more column named “date” and submission date will be shown,
More Ninja Forms Smart tags is supported in the PRO version of Ninja Forms Google Sheet Connector


